Most homeowners judge a new roof by how it looks from the driveway. That is fair, but it is only half the job. The other half is the closeout, the short stretch between the last shingle going down and the crew pulling away. What happens in that stretch decides whether you can make a warranty claim in year eight, whether your insurer believes your roof is new, and whether you find a stray nail with your tire in the spring.
A good contractor treats closeout as part of the work, not a courtesy. A weak one hands you an invoice and a wave. This guide lists what a Calgary homeowner should receive at the end of a reroof, so you know what to ask for and what a missing item might mean.
The warranty paperwork, and who actually registered it
Shingle manufacturers back their products, but the coverage often depends on the roof being registered with the right information and installed by the right people. Some of the strongest coverage tiers are only open to contractors the manufacturer has certified. Ask which warranty applies to your roof, and ask who files the registration.
You want a copy of the registration confirmation, not a verbal promise that it was sent. The document should show your name, your address, the product line and the date of installation. If your name is spelled wrong or the address is off by a digit, fix it now. A claim years later gets slowed down by clerical errors that took half a minute to prevent.
There are normally two separate promises on a roof. One comes from the manufacturer and covers the material. The other comes from the contractor and covers the workmanship. Get both in writing, and read the workmanship part twice. It should say what is covered, for how long, and what voids it.
Material details you will be glad to have later
Ask for the product names, colours and the lot or batch information from the bundles that went on your roof. Shingle colour can shift slightly from one production run to another. If a hailstorm or a falling branch damages one slope in a few years, the person repairing it needs to know what they are matching.
The same goes for underlayment, ice and water barrier, starter strips, ridge caps and vents. A simple list on the final invoice is enough. If the invoice says only “supply and install shingles,” you have no record of what is actually up there.
Permits and inspections, where they apply
Many reroofs in Calgary are straightforward like-for-like replacements, but some jobs involve structural repairs, changes to the roof framing or other work that brings the City of Calgary and the Alberta Building Code into the picture. Ask your contractor up front whether your job needs a permit, and who pulls it.
If a permit was issued, the closeout should include proof that the work was inspected and signed off. A permit that is opened and never closed can surface when you sell the house, and it becomes your problem, not the contractor’s. If no permit was needed, a good crew will tell you why in plain words.
Photos that prove what is under the shingles
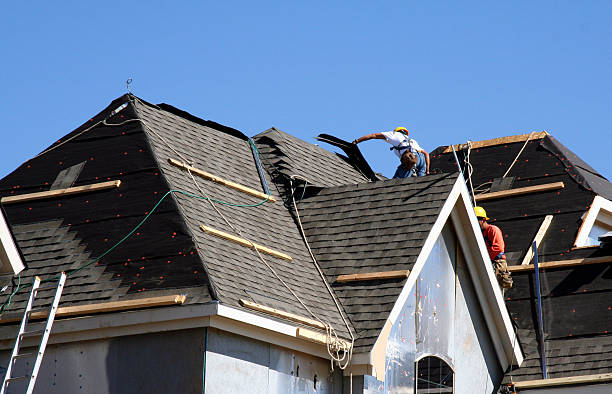
Once the shingles are down, nobody can see the deck, the underlayment or the flashing. That is the whole reason to photograph them before they are covered. A reputable crew takes dated photos at the key stages: the bare deck after tear-off, any rotted sheathing that was replaced, the ice barrier at the eaves and valleys, the flashing at walls and chimneys, and the finished slopes.
These photos do real work. They show an insurer that your roof was properly built if a claim ever comes up. They show the next buyer’s inspector that the details were done. They also settle disagreements quickly. If you ever wonder whether a rotten section of plywood was replaced, the picture answers it.
Ask for the photos to be sent to you as a set, in order. A handful of finished-roof pictures taken from the street do not count.
The cleanup you should expect to inspect yourself
Tear-off is messy. Old shingles, nails and bits of underlayment end up in places you would never think to look. A proper crew runs a magnetic sweep over the lawn, flower beds, driveway and the edges of the garage. Ask whether they did, and then do your own walk with a bit of patience.
- Check the driveway, the walkway and the strip along the foundation where debris lands first.
- Look inside the eavestroughs. Granules and small scraps collect there and can block a downspout before the first rain.
- Check window wells, deck boards and under the barbecue cover for roofing nails.
- Confirm the bin or trailer is gone and that any ruts in the lawn are noted before the crew leaves.
Leftover bundles are another item people forget. Some homeowners want a few kept for future repairs, and that is a sensible request, since a matching bundle from the same run is hard to find later. Ask the crew to leave them stored and labelled, or to haul them away if you prefer.
The final walk-through, done together
The walk-through is the last chance to raise a concern while the crew is still on site and the job is fresh. Stand in the yard with the foreman and look at the roof together. Check that the ridge line is straight, that the vents and pipe flashings look tidy, and that no exposed nail heads show. Ask what ventilation was installed in the attic and why.
Ask about next steps too. A good contractor will tell you when to expect the first inspection of your roof, what to watch for after the first heavy rain or the first Chinook thaw, and who to call if something looks wrong. They should also tell you what you should not do, such as pressure washing the shingles or climbing up to clear snow with a metal shovel.
If you spot something you do not like, say it out loud and ask that it be noted on a short written list. A verbal promise made in a driveway is easy to forget. A list with a date on it is not.
What to watch during the first winter
A new roof still has to settle into a Calgary winter. The first cold snap, the first heavy snowfall and the first Chinook that melts it all in an afternoon are the real test. Give the roof a look from the ground after each of those events. You are checking for shingles that have lifted, a ridge cap that has shifted, or fresh dark stains on the ceiling below.
Pay attention to the eaves. If meltwater refreezes there and builds a ridge of ice, the cause is usually heat escaping into the attic or weak ventilation. A crew that has just finished the roof should be willing to look at that, because ventilation was part of what they installed. Take photos of anything odd, with the date, and send them to the contractor early. A small concern reported in November is cheap to look at. The same concern found in April, after a season of water, is not.
Keep the closeout folder together in one place: the registration, the invoice with product details, the photos, the permit paperwork if there was any, and the written list from the walk-through. Some homeowners scan it all and email it to themselves. That way the paperwork survives a move, a flood in the basement office or a lost folder, and a future buyer can see exactly what was done.
Hold back the last payment until the list is complete
You do not have to be adversarial about this. A closeout package is a normal part of a well-run reroof. Warranty registration, material details, permit sign-off where one applies, a set of dated photos, a clean yard and a walk-through are the baseline. If a contractor balks at any of them, that tells you something about how the rest of the job was handled.
If you are planning a replacement and want to see how a certified crew runs the whole process from first visit to final cleanup, take a look at residential roof installation in Calgary before you compare quotes. Then keep your closeout folder somewhere safe. The day you need it will arrive without warning, and you will be glad it exists.
About the author: this article was contributed by the team at Angel’s Roofing in Calgary, a COR certified roofer with a full-time safety coordinator on staff and a GAF, IKO and Malarkey certified installer. The crew works on homes across the city and explains every step of a reroof to the homeowner.